On Tuesday Apple released the Apple TV “Take Two” update, a software update that brings a redefined interface and new capabilities to Apple’s set-top box, including support for movie rentals from the iTunes Store, music purchases from that same Store, and access to .Mac and Flickr photo-streams.
I’ve had the opportunity to take a couple of spins around the update, which is available for free to all Apple TV owners. Here’s what I’ve found.
Updating
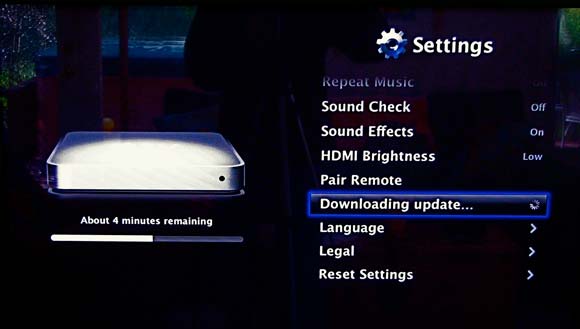
Updating existing Apple TVs is a simple matter. Just navigate to Settings, choose Update Software, and press the Apple Remote’s Play/Pause button. The Apple TV reports that an update is available and offers you the option to Download Now or Update Later. When you choose Download Now the Settings screen shows Downloading Update, a progress bar, and the amount of time the Apple TV anticipates the download will take.
My Apple TV is connected to my network over a wireless 802.11n connection. The Apple TV suggested it would take around 11 minutes to download the update and that suggestion was on the mark.
Once the download is complete, you have the option to Update Now or Update Later. The Apple TV Update screen warns that the update will cause the Apple TV to restart several times. This is true. I counted five separate restarts before the Apple TV was ready for business. Total time to install the update was around 10 additional minutes with an Apple logo and progress bar showing much of the time.
When the update is finally installed you’ll see the Apple TV’s new opening animation and then the new interface.
A new face
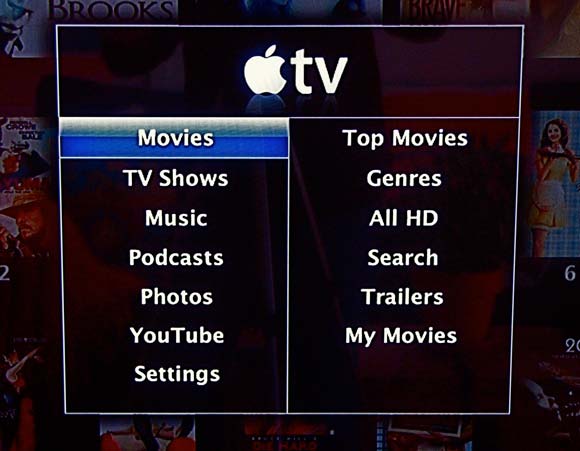
Apple has nicely simplified the Apple TV interface. Essentially it’s made up of a box with two columns, which replace the rotating functions we saw with the original Apple TV (and that still exist in Leopard’s Front Row). Within this box you see Movies, TV Shows, Music, Podcasts, Photos, YouTube, and Settings entries along the left side. To the right are commands specific to the selected entry on the left. So, for example, if you’ve selected Movies you’ll see Rented Movies (if you’ve rented a movie on the Apple TV), Top Movies, Genres, All HD, Search, Trailers, My Movies, and Shared Movies (if the Apple TV is either synced with a computer or is streaming content from a computer). Let’s take a look at these entries, their commands, and what they bring to the Apple TV experience.
Movies
In the past, you used the Apple TV’s Movies entry to view trailers—top movies for sale on the iTunes Store or general theatrical trailers—and access movies stored on the Apple TV or streamed from a computer’s iTunes library. The new movies entry includes these options as well as the means for previewing and renting movies from the iTunes Store (you can’t purchase movies from the iTunes Store with the Apple TV).
When you choose Top Movies you’ll see a screen filled with movie posters. The top row includes featured films. The rows below show Top Rentals (25 entries), Just Added (28 entries), Staff Favorites (18 entries), and a row of movies specific to a particular genre. When I was using my Apple TV, this row held 17 westerns.
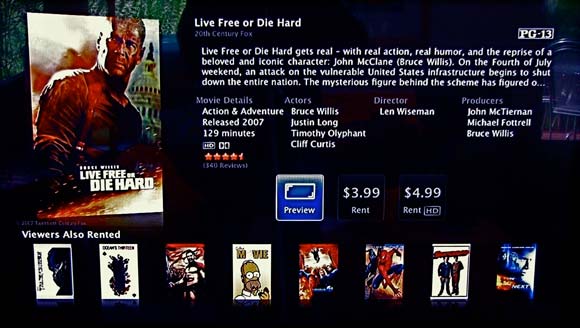
To navigate to a movie, just use the Apple Remote to move up, down, left, or right. When you select a movie, its title is shown below. Click a selected movie and you’ll see an information page where you the movie poster at a larger size, a plot description, movie details (release date, length, actors, director, and producers), a Preview button, and options for renting the movie. Standard definition versions of movies are available for $3.99. If an HD version is available it will cost $4.99. Many, but not all, HD versions include a Dolby Digital 5.1 soundtrack, which the Apple TV is now capable of playing. At the bottom of this screen you’ll see a Viewers Also Rented area that displays movie posters for films that others renters of that particular film have also rented.
To rent a movie, just choose a rental option (standard or HD) and press the Remote’s Play/Pause button. If this is the first time you’ve used your Apple TV to purchase or rent something, you’ll be prompted for your Apple ID and password. After you’ve entered them you’ll be offered the option to save this information so you don’t have to enter it again (you can delete this information within the iTunes Store area of the General setting by choosing the Sign Out command). This is helpful, as the Apple Remote isn’t the most flexible input device on the planet and the less time you spend choosing a letter, navigating to the next, and on and on, the happier you’ll be.
Just as with movies you rent directly from the iTunes Store with your computer, you have 30 days to begin watching the movie and then 24 hours to complete watching it once you’ve started it. (Bonus feature: If you’ve already rented something, the Apple TV will tell you so and ask if you’re sure you want to rent it again.)
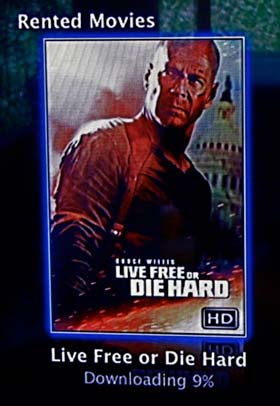
Once you’ve agreed to rent a movie, it begins downloading to the Apple TV. A Rented Movies screen appears that displays the poster of the movie you’re renting. Below that movie is its title along with a progress entry that tells you how far along the download is (by percentage of movie downloaded). While the movie download you can press the Menu button to back up through the interface to use other parts of the Apple TV. When enough of the movie has downloaded so that you can watch it without interruption, an alert will appear on your TV screen.
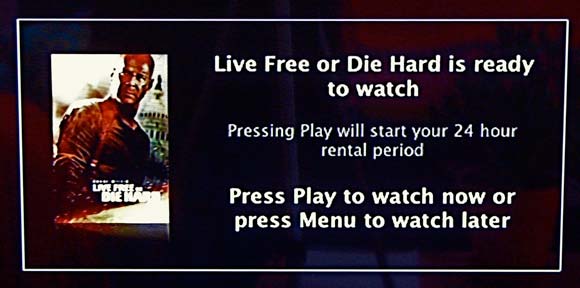
I rented the HD version of Live Free or Die Hard and 12 minutes after initiating the download, I was told that I could begin watching it. Once a rental is ready to watch, a Rented Movies entry appears in the main interface when you select the Movies category.
The Movies entry also offers ways to search the iTunes Store for rentals. Among them you’ll find a Genres command for viewing movies for rent by genre (G, PG, Action & Adventure, Comedy, etc). You can also choose an All HD command to see just movies offered in high-def. Choose Search and you can use the Remote to enter letters to search for the movie titles you seek. It’s clumsy, but no clumsier than doing the same kind of thing on a TiVo.
This Apple TV’s Trailers entry shows only theatrical trailers for movies playing today in movie theaters. (If you want to see trailers for movies available from the iTunes Store, you do so from within a particular movie’s information screen.) Within Trailers you can choose to view just HD trailers or choose all available trailers by title.
The last two entries, My Movies and Shared Movies, bear some explanation. With the original Apple TV you had to choose from among your media sources—media stored on the Apple TV or media stored on synced and streaming computers. Apple has simplified this by creating these two entries. The first, My Movies, is for movies you own that are stored on the Apple TV’s hard drive or are on the computer the Apple TV is synced with. Rental movies don’t appear here but rather in their own Rented Movies entry. When you select Shared Movies you’ll see those movies available on computers connected to the Apple TV for streaming. These My and Shared entries are also found under the TV Shows and Music headings and work the same way—My media is for media stored on the Apple or synced computer and Shared media is for media that’s being streamed to the Apple TV.
TV Shows
TV shows can’t be rented from the iTunes Store, only purchased. Therefore, the commands you see when you select the Apple TV’s TV Shows entry are a bit different. You can search shows by Top TV Shows, Genres, or TV Networks. You also have the option to use Apple TV’s Search feature.
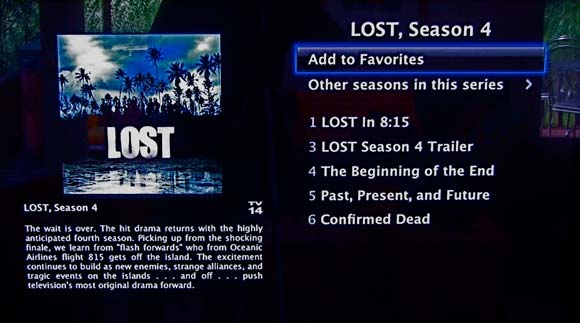
While it’s reasonably easy to find shows, Apple TV includes a helpful Add to Favorites command within a show’s information window. When you add a show as a favorite, it appears in a new Favorites screen. Just choose Favorites and you have quick access to the shows you really care about, making it easier to purchase additional episodes.
As with movies, you can preview a particular episode by choosing it and selecting the Preview option in the episode’s information window. You can also purchase the episode within this screen. If a show can be purchased by the season, you’ll see that option here too. I didn’t see a subscribe option for any of the shows I examined. Like Movies, you can view My TV Shows (those shows stored on the Apple TV) or Shared TV Shows (shows stored on synced and streaming computers).
I purchased the last episode of this season’s Lost and was pleased that it was available for playing in less than a minute after I purchased it.
Purchased TV shows and music are automatically synced back to the computer you’ve designated to sync your Apple TV with. There’s no need to tell iTunes on your computer to do this, it just happens as part of the sync between the two devices.
Music
Just as you can with TV shows, you can purchase music from the iTunes Store with your Apple TV. Options when you select the Music entry in the main interface include Top Music, Music Videos, Genres, Search, and the expected My Music and Share Music. The first five entries are your means for finding music on the Store.
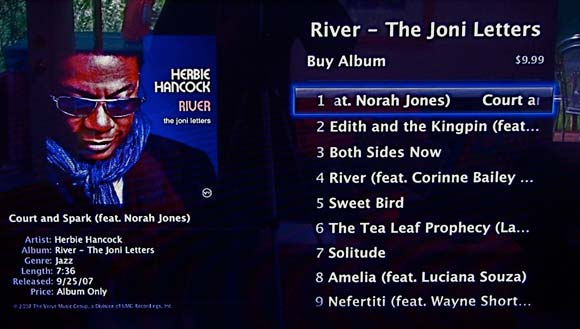
To purchase music, you can either select a track and then purchase just that track (if it’s available—just as with the iTunes Store in iTunes, some tracks are available only when you purchase the entire album)—or purchase an album. The album price appears in the upper-right corner of the album screen.
Podcasts
Podcasts are also highly searchable. You can choose these command when you select the Podcasts entry in the main interface: Favorites, Top Podcasts, Genres, Providers (1UP, ABC News, and NPR, for example), Search, My Podcasts, and Shared Podcasts. When you find an episode you like, select it, press Play/Pause on the Apple Remote, and select the Download button. You don’t have the option to subscribe to podcasts with the Apple TV but the Favorites entry makes it possible to easily find the podcasts you enjoy most.
Photos
The Photos entry has changed significantly. While you can still view photos you’ve synced to your Apple TV, you also have the option to view photo-streams from .Mac Photo Web Galleries and Flickr contacts. I tested each and they work well and don’t require a lot of text entry.
To view a .Mac Web Gallery just enter a .Mac member name. Any photo galleries that this member has created for general viewing (meaning they’ve allowed everyone to view the photos) will appear in a list on a screen devoted to that person’s .Mac member name. You can’t access password protected galleries, however.
Viewing the pictures of Flickr contacts is just as easy. Enter a Flickr user’s member name and any public photos they have will be available to you. Better yet, you can view that person’s contacts and add them as favorites. This is a great way to quickly add a wealth of Flickr contacts.
YouTube
Pretty much the same as before. You can view Features, Most Viewed, Most Recent, Top Rated, and choose History, Search, and Log In options.
Settings
Many of the settings are similar to the original Apple TV’s—here you find settings for your network, screen saver, audio, video, and connected computers—with a couple of intriguing additions.
The first is the AirTunes option within the Audio setting. As you can with an AirPort Express Base Station you can stream audio from your computer’s iTunes Library to an AV receiver or powered speakers attached to your Apple TV. Very cool.
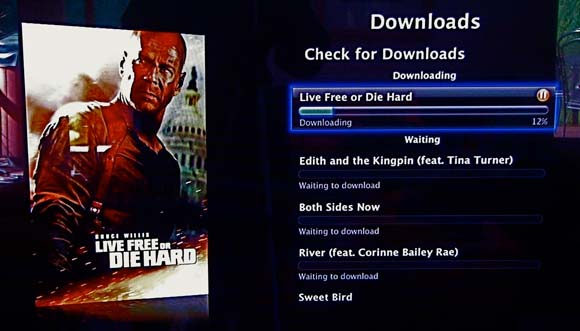
The other is a Downloads entry where you can view the progress of all the files being downloaded to your Apple TV. Within this area you can prioritize what’s being downloaded. For example, if you’ve rented an HD movie and then purchased an album, the movie will occupy the Apple TV’s attention and the album will just have to wait. However, if you select that movie and press Play/Pause on the Apple Remote, the movie will be demoted one position so that the next item in the list becomes the priority download. You can promote items by similarly selecting them in the queue and pressing Play/Pause. Yes, it would be nice if you could select a movie and find a way to drop it to the bottom of the queue but I haven’t discovered a way to make that happen.
How’s it look?
Darned good. I’ve watched the first 15 minutes of Live Free or Die Hard and the picture is great on my 42-inch Panasonic plasma display. With a digital audio cable connected to my AV receiver the movie caused the receiver’s 5.1 Dolby Digital Audio light to glow and the resulting sound was bigger than anything I’ve heard come out of the box previously.
I’ll be giving that movie and Apple TV’s new features a far more careful look in the days to come. Stay tuned for more.